Video Editing in Canva? Are we going mad? Sure, Canva is primarily known for its killer design tools, but did you know it’s also got a slick video editor? We are using Canva video editor on a daily basis, mainly for some basic social media content, even for basic animations. So, let’s dive in and see how to get started. First things first, sign up for a free Canva account and log in. Once you’re in, head over to the video section and pick a blank template to kick off your project.
“Canva’s video editor is super simple to pick up and use, but there’s also plenty more advanced features and cool animations and custom effects under the hood as well.”
Justin Brown

Canva Interface
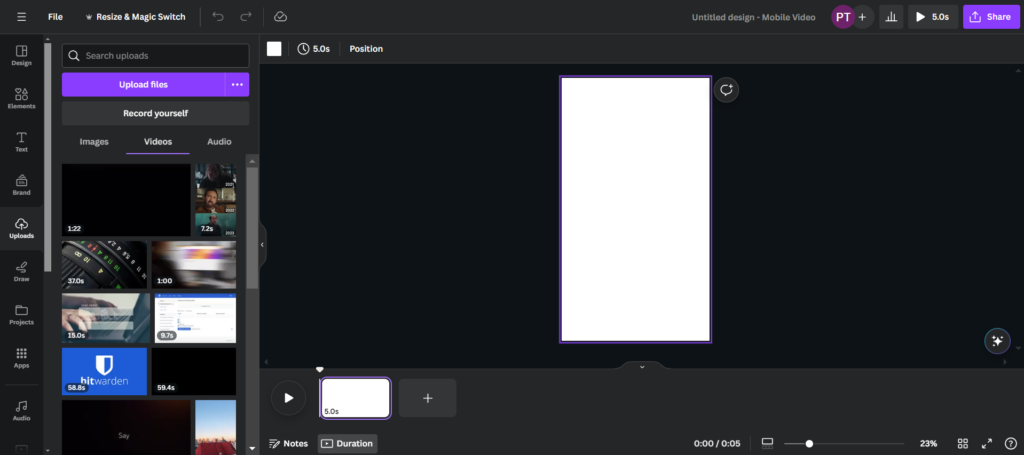
The Canva video editor’s interface is pretty straightforward. You’ve got your main canvas area for crafting your masterpiece, a timeline at the bottom for organizing your clips, and a bunch of tools and controls on the left panel. The top menu bar changes depending on what you’re up to in your edit.
On the left panel, you can see a lot of options, however, in this tutorial, we will focus on “Elements” and “Uploads”. As you probably figured, that’s the place where you will import your footage.
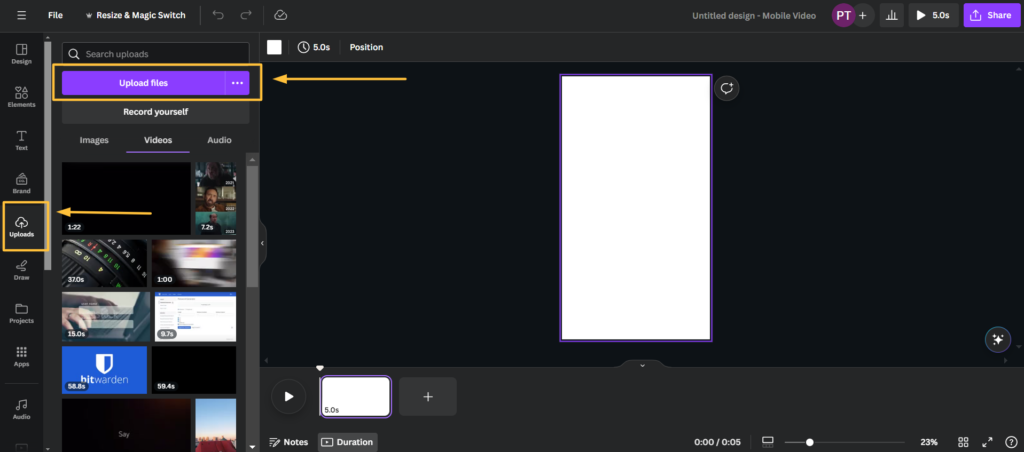
How to Import Footage in Canva
Time to bring in your footage! Hit up the “Uploads” tab and grab your video files from your computer or other spots Google Drive, or Dropbox. Here’s the cool part: you can start editing right away, even while your footage is still uploading.
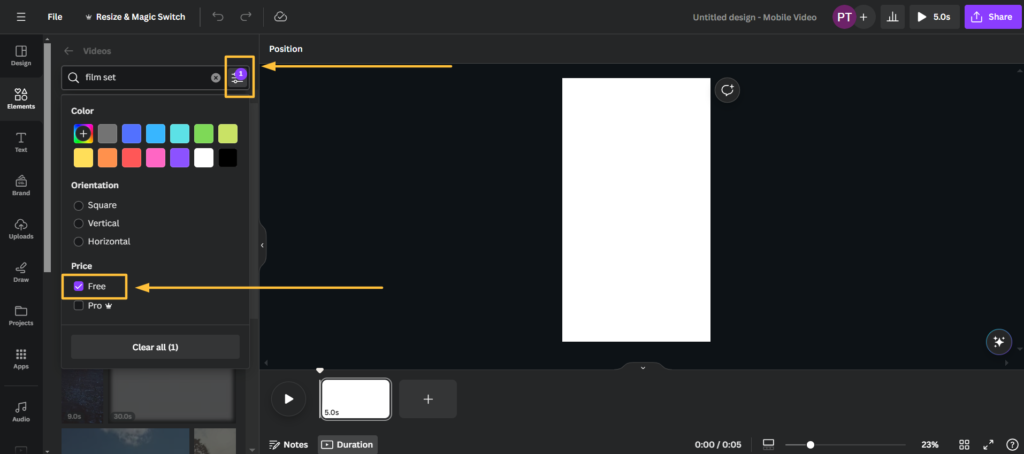
Another great thing about Canva is that you can find a library with videos that you can use in your piece. You will have to go into the “Elements” tab and scroll to the videos. You can also search for some specific footage topics that you need.

This feature is great for Cnva Pro users, however, you can still find some jams with the free version. When searching, click on the tree lines that look like a hamburger menu and choose “Free”.
How to Edit and Trim Footage in Canva
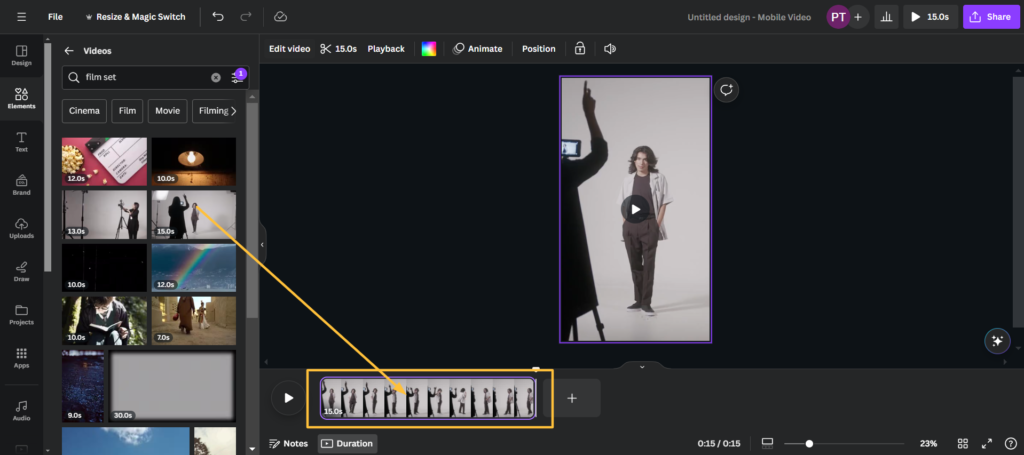
Now that your footage is loaded up, it’s time to chop and change it to perfection. But, if you want to start editing you need to add some footage into the timeline, so drag and drop your material and you are good to go.
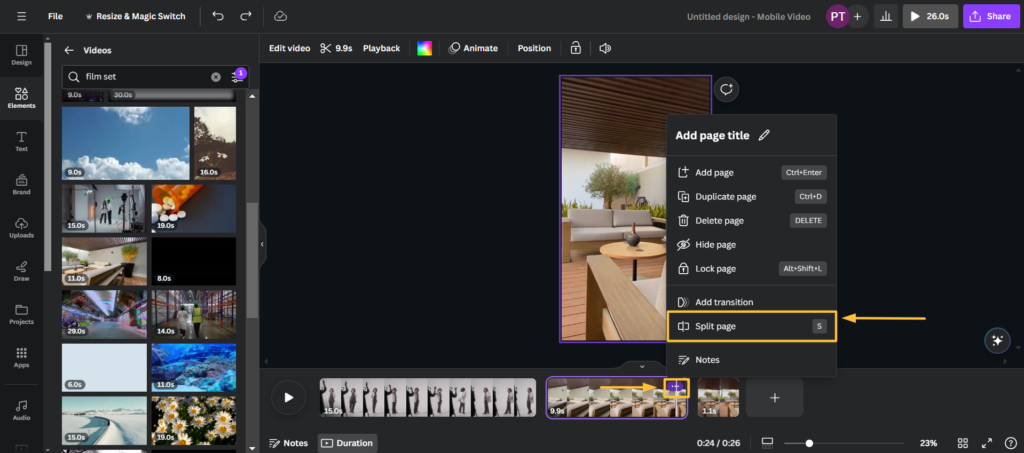
Now, how to slit footage you ask? Well, it’s easy, you can just press “S” on your keyboard, or you can click on three dots that are displayed on every footage in your timeline and select the “Split” option. We prefer pressing “S”…
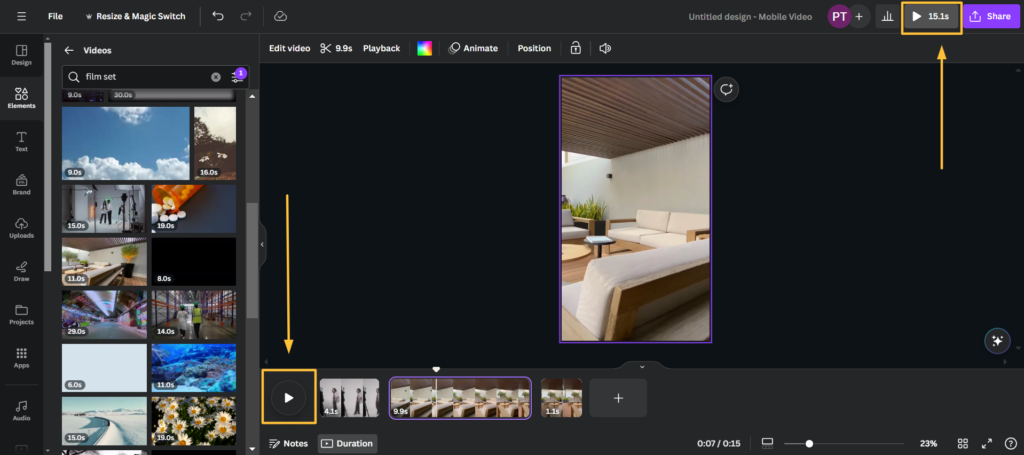
Ou, and you can playback your footage in two ways, directly in your workplace or as a preview of your work. One play button is sitting at the start of your timeline and the preview button is waiting for you at the top right.
How to Add B-roll in Canva
Wanna spice up your video with some extra footage? Canva’s got your back. While you can’t layer video clips like in a pro editor soft like Premiere Pro or DaVinci just yet, you can still throw in some sweet b-roll. Just trim and position those clips to fit the vibe of your project.
Film Composition Examples
Within this FREE PDF, you will discover:
- film composition examples in movies
- how filmmakers employ composition techniques
- how to create unforgettable cinematic experiences

How to Add Titles in Canva
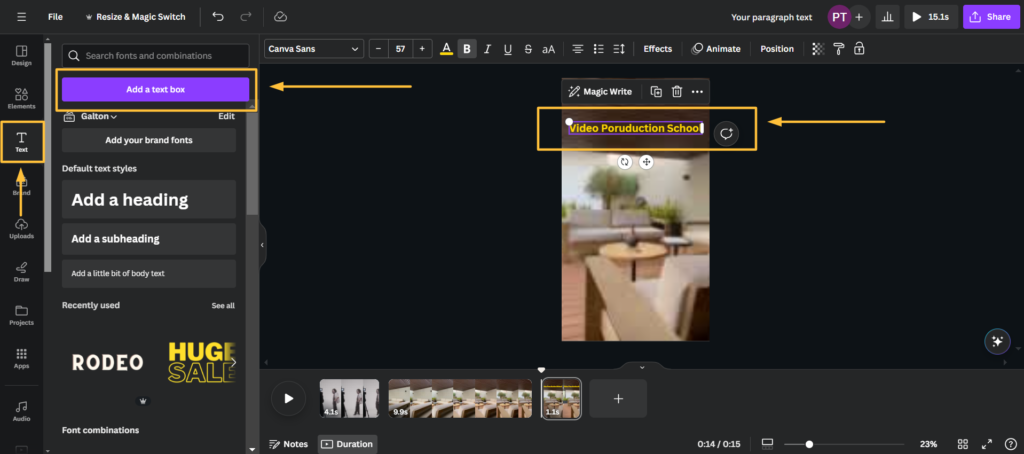
Titles and text can really level up your video editing game in Canva. Canva hooks you up with tons of templates and animations to make your text pop. Adjust the timing to keep things snappy.
Just click on the “Text” tab in the panel on the right side, and choose a style you would like to add to your masterpiece. Don’t worry, you can always change the style, font, size, or color of your text. You can even add some doope animations to it, and quickly. This feature we love in Canva.
How to Add Effects & Transitions in Canva
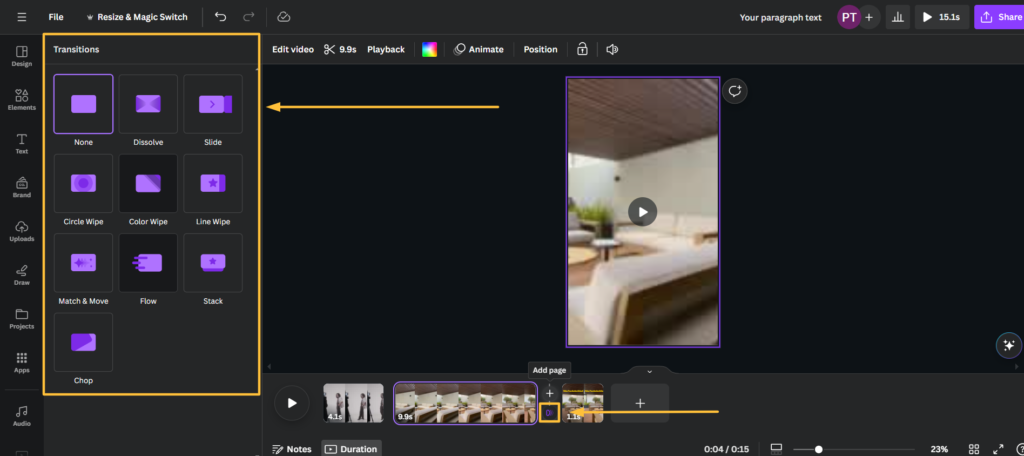
Time to add some flair! Canva got a bunch of transitions to choose from like dissolves and wipes. You can also zoom in on clips to add some visual effects.
To add some of the Canva transitions, you need to hover on the empty space between your clips. After that, a transition option will magically appear. You just need to click on the “Transition” icon and pick on the options.
How to Add Music in Canva
No video is complete without a killer soundtrack. Canva got a library of royalty-free tunes to set the mood. Just tweak the volume levels to keep everything sounding tight.
Now, if you ever tried to edit videos in Canva, you maybe wondering, where is this audio library? We can feel you, it’s not placed where you can intuitively find it. In the right panel, you need to scroll down and choose the “Audio” tab. Once you get it, it’s pretty easy, again you can leverage the drag-and-drop feature and place some tunes you like into your timeline.
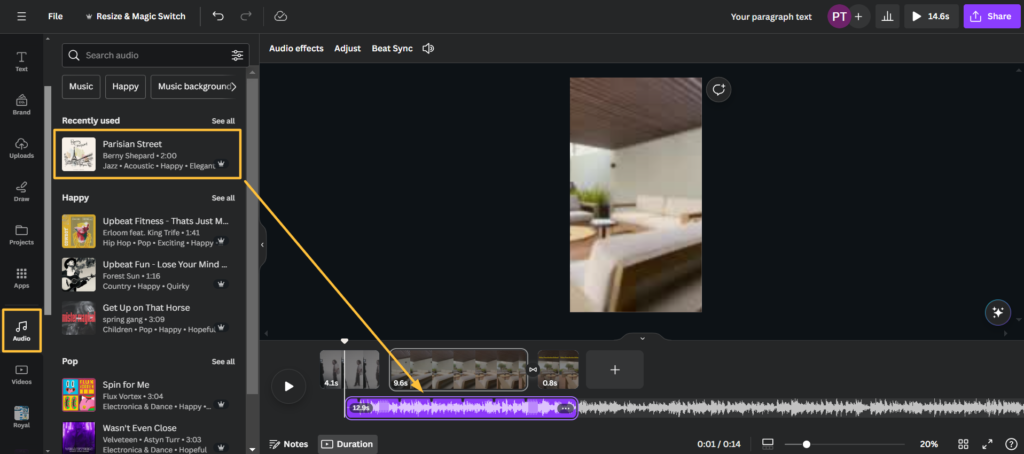
But don’t forget to choose “free” music like you did with the footage, the process is the same until you have a Canva Pro, then you are good to go with every audio jam you will find.
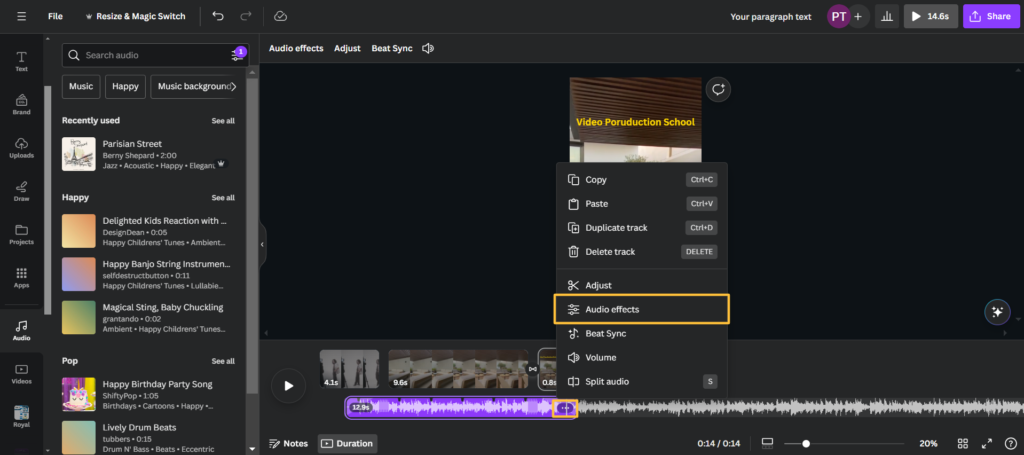
How to Adjust Audio in Canva
Speaking of audio, you might need to fine-tune the levels of your clips. Canva lets you easily adjust the volume of each clip so your music and dialogue are perfectly balanced. You can even add a fade in and out to your audio. Just click on the three dots on your audio track and choose “audio effects”.
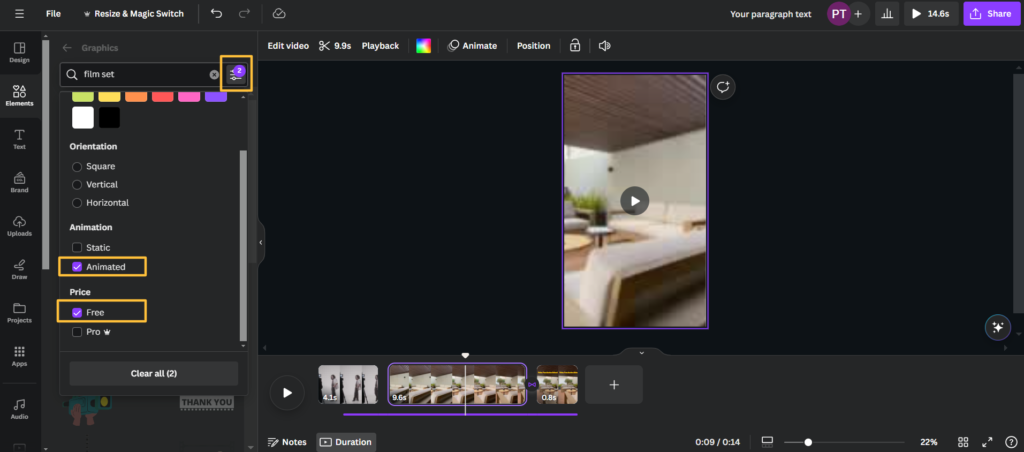
How to Add Graphics in Canva
Spruce up your video with some sick graphics. Canva has a ton of templates and graphics to choose from. Just drag ’em onto your project and make ’em your own.
Again, go to the “Elements” section and find “Graphics”
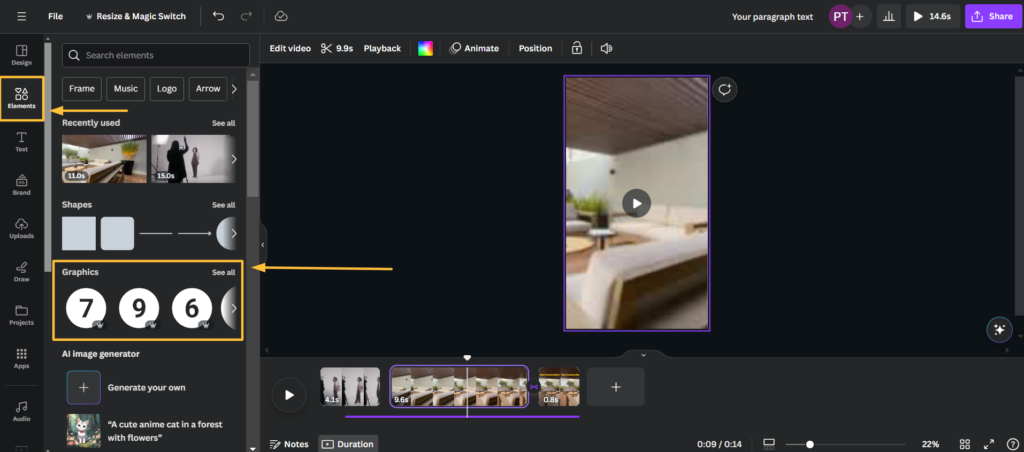
Now, you can search for graphics that you would like to add to your Canva video and filter if you want static or animated GIF and of course a “free” option.
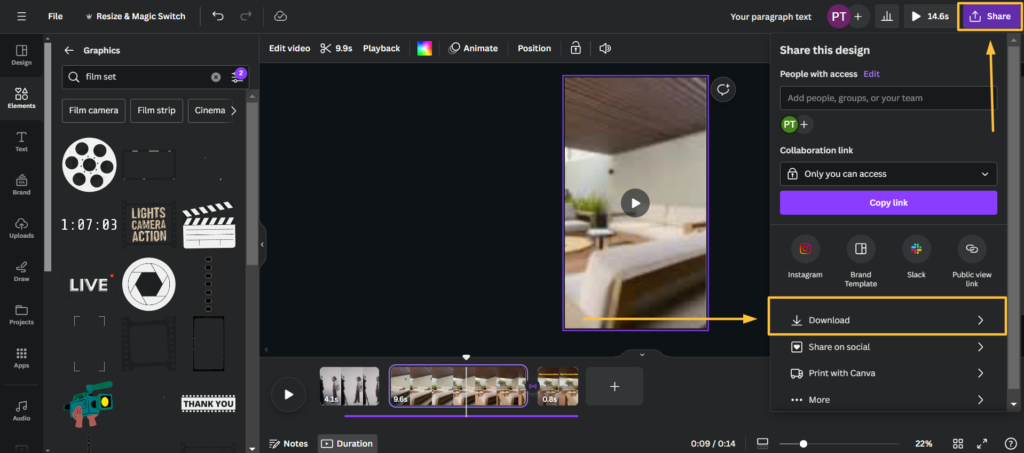
How to Export in Canva
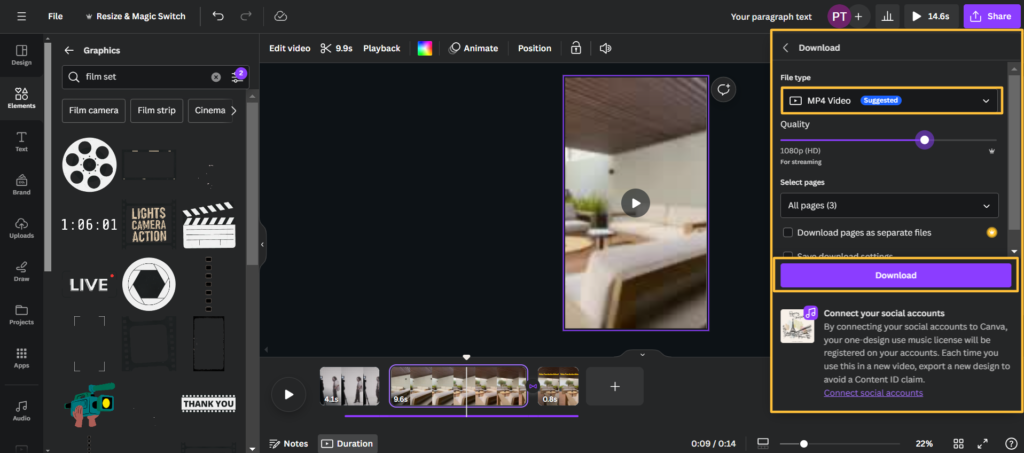
Once you’re stoked with your edit, it’s time to share your masterpiece with the world. Canva lets you download your video in MP4 format straight to your computer. Give it one last watch to make sure it’s all good, then hit export and get ready to blow some minds.
Exporting process begins at the top right and the button “Share”. Click on it hard and choose “download”.
And the last step in jour video editing in Canva journey is to hit the “Download” button. Canva Pro users have some more options like increasing the quality of the export to let’s say 4k. However, you can export Full HD with a free account.
Video Editing in Canva Conclusion
In a nutshell, Canva’s video editor is the bomb. Whether you’re a newbie or a seasoned pro, it’s got everything you need to create killer videos in no time. So what are you waiting for? Get out there and start video editing in Canva today!
Film Composition Examples
Within this FREE PDF, you will discover:
- film composition examples in movies
- how filmmakers employ composition techniques
- how to create unforgettable cinematic experiences

Explore related content

Video Editing Tips CapCut: Tips, Tricks, and Techniques
Video editing is an art, and there are proper tools and techniques, through them everybody… Read More »Video Editing Tips CapCut: Tips, Tricks, and Techniques

Factors to Consider Before Buying a Video Editing Computer
From helping grow your brand and business to editing just for fun with the love… Read More »Factors to Consider Before Buying a Video Editing Computer

Best Video Editing Monitors in 2024
In the evolving world of video production, the importance of a high-quality monitor cannot be… Read More »Best Video Editing Monitors in 2024